ray...
 The happy Nada Farmer, finding new ways to make the same mistakes for 57 years.
Keep coming back , I'm sure I'll screw up something else soon.
Ray McCune's Website
Hey there fans, I have been doing an amazing amount of nothing recently, due to heat, and my back getting rapidly worse. Still as long as there are pain meds and broken big boy toys I will be doing my best to be involved. So I have alluded to a number of projects and promised updates as Malfunction Junktion Pages, to avoid boring some less mechanically interested readers. WE know, it's all about the readers, right? So let's see what I remember, off the top of my poor sunstroked head.
When I first got the Ford 2/8/9 N tractor it had a coil and resistor and a "modified" cap on the electrical system. I ordered a 12 volt coil and new wires and cap and rotor and plugs and figured I had it licked for good, new battery too! well then last fall on thy day I needed to have everything moved for the concrete delivery--- pfffft, no start, no run, no nothing! So we rolled it out of the way and got the job done. This late spring I finally ordered 2 more coils. (I have found that if I have a spare of anything I never need it.) I put the new coil on, and it still didn't run right away, as I had tried a couple other things in the mean time, and had replaced the points just to be sure. I did this with a mirror as the points and condenser are mounted on the front of the engine, where I couldn't get to them, because of the radiator. You remember in the past, when I might have mentioned, when all else fails read the directions? Which then lead to the concept of having a book for everything mechanical that could have a book? Well, when I finally decided I was going to have to do something drastic, like remove the radiator, I decided to search for and found the book I had purchased when I first got the tractor. It said "to take the distributor off the front of the engine and make the adjustments and then put it back on, two bolts and no way to put it back incorrectly," It is basically a universal setting. So I did, I adjusted the points replaced the capacitor and put the new coil in place. I had already charged the battery for a couple days getting to this point. and grind, grind, grind, nothing happened! I had retrieved the old style timing light, and it said there was no spark! Everything was new, it was all set properly and no spark. Now I was KERFUFFLED (I will use that word as I think children may read some of this stuff) I really got serious now and started over the entire system with a Voltmeter jumping and shorting and testing everything I could. Finally I decided the points weren't making 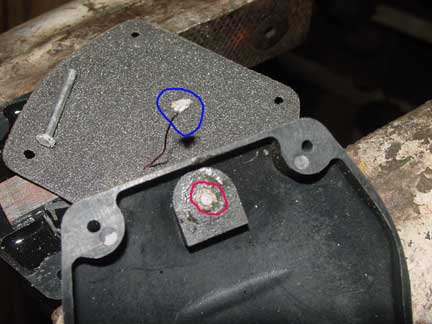 contact, basically because everything worked up to the new points, and stopped.
Meanwhile I had taken the old coil apart, I knew it was no good and tried to determine what was wrong with it... simple problem. bad solder joint.... So as soon as I re soldered it, it was as good as new.
In the picture, the part circled in blue, should be attached to the part circled in red, by the blob of solder on the part circled in blue.
Yep, just that easy, and I now have two spare coils for a 12 volt conversion for a Ford tractor . Talk about supply safety!
I used a point file to clean and reset the "NEW" points, put everything back together, and attempted to start the engine, I guess I should say started the engine. Cause it purred to life and stalled immediately, then I turned the fuel on and tried again. This time it ran just as smoothly as before, and the radiator started blowing fluid all over everything! I just shut it off and left it sit, too much for one day.
Meanwhile, we were working on Ryan's truck, installing the new computer, and discovering that the lack of a spark would keep the fuel from flowing, which was the problem, because of an intermittent "distributor sensor coil." Not the main computer. But now it is all new, and the truck runs pretty good. Of course all the parts that were removed by the previous 80+Y. O. mechanic and replaced by the near 60 Y. O. mechanic who had only a cheapy book to go by, not everything is working smoothly yet... But we have hope!
I had Ryan look for the radiator leak on the Ford 2/8/9/N while I started it up, He could get down and look up, which I can't do anymore, and using a flashlight, try to pinpoint the leak... it didn't, leak I mean. What the frabisnatz!
My buddy bob dropped off a trailer of projects, that included the trailer, about 4 weeks ago. Just to give me something to take a shot at, if I got bored, WOW have I been less than bored!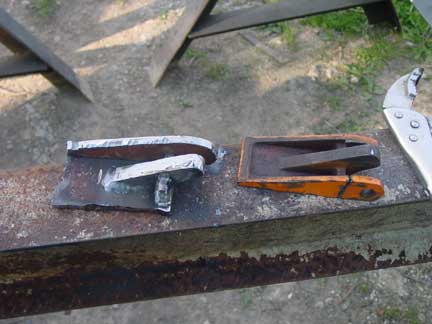 Let's start with the hydraulic spreader I broke a couple years ago trying to remove a trailer hitch, truth is it may already have been damaged before that, but attempting to remove the" rusted in trailer hitch" from a pickup I got at a tremendously low price of "get it out of here!" finally brought about it's demise. It was cast crap anyway, a "surplus junk store" special deal, that I actually took back and got an immediate replacement for, When I first got it. It leaked like a sieve, and pushed nothing, although it was rated at 1000 pounds. The entire set was red, except this part, it was orange, and when it broke, I kept the parts with the intention of making a new one out of steel. So after the success of making a battery tray / step, for
 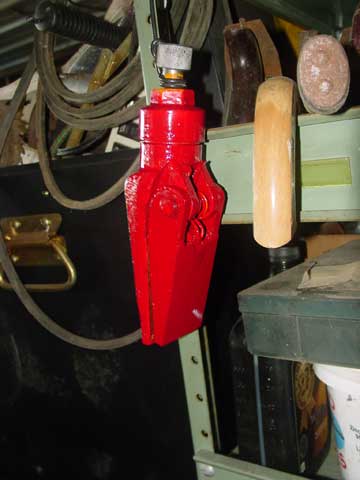 one of Richard's tractors, I just kept cutting with the plasma torch until I had the parts I needed. I followed the broken one for a pattern, and eventually I ended up with the part you see here, after a red paint job, hanging to dry.
It works fine, and fits the same place the original did, in the case.
Pretty straight forward project, no drama, kinda boring huh?
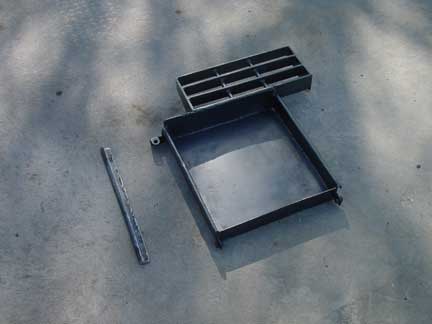
Then there was Richards battery box/tray step. Rusted out beyond reason, and causing him some grief as the battery was strapped to another step, and a real issue when entering and exiting the tractor. Which was generally in the way of something else that needed to be moved. The second picture is the "tray" in process, so you won't think I just purchased a replacement and decided to take credit for making it, Ha! like I'd do that, Where's the challenge in that little activity??
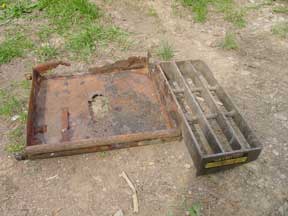
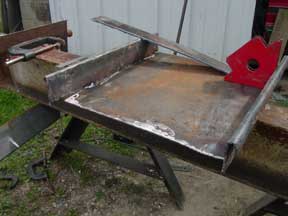
 So I got to work on it, and came up with this little "pretty". The real issue was making the J channel bends so it would slide into the side of the tractor . As this was the tough part for me to accomplish, of course there needed to be another one fabricated to replace the one on the tractor itself, as it had also rusted away. I created them by "blacksmithing" the edges over the I-beam I was using as a table for this little exercise. I cut the step off the rusty remnant, and reattached it, I was even able to match the paint color of the original.
YOU know? I'm damn near amazing some times! So I have to have an occasional "failure" to keep me humble. But I never know when it will be, and so far it has only created inconvenience, and not a hazard for anyone. But it was a day of pretty miserable welding in a tense atmosphere, with a degree of accuracy I was proud of, but it only lasted 3 bales. NO PENETRATION! And I had to call in a helper to keep me from catching everything on fire while I did it...
The problem was twofold, I didn't know how thick the material that the roller was made out of was, and I was trying to keep the roller straight, it ended up within .005 TIR which I was real happy with, but due possibly to the hardness of the material and my fear that I would melt through it, I only welded it at 130 amps, which should have been enough for a mild steel 1/8 inch wall roller, but it wasn't it was a 3/8 inch wall hard as a "mill file" steel rollerand those 130 amps didn't really touch it. A couple days later I saw Richard again and he said "hey about that roller, how may bales of hay you think it lasted?" Sensing there might be a punch line I said, "What, about 12?" "THREE, right up till then, the bailer worked great, you know we were having trouble with it last week. Taking way too much power to run it, even changed to a higher powered tractor hoping it was just becuase of some wet hay we had wrapped up in it. Then we found that roller cracked! And after you fixed it it worked great, till it completely failed! So I ordered a new one." Roller that is. So I asked if I could have it, to see what it would take to weld it correctly. and here it is, broken and removed and showing my complete lack of any penetration, at all!
Man, are we happy out here!
 The happy Nada Farmer, finding new ways to make the same mistakes for 57 years.
Keep coming back , I'm sure I'll screw up something else soon.